
Every session takes about 15 minutes and builds on the one before it — position, breathing, and difficulty all progress together so your body is never guessing what comes next.
Before you can strengthen the pelvic floor, you need to feel it. Phase 1 is spent lying down, learning to isolate and control the right muscles — without tensing your thighs, abdomen, or buttocks.
Each session: Get into position → Practice the contraction → Cool down.
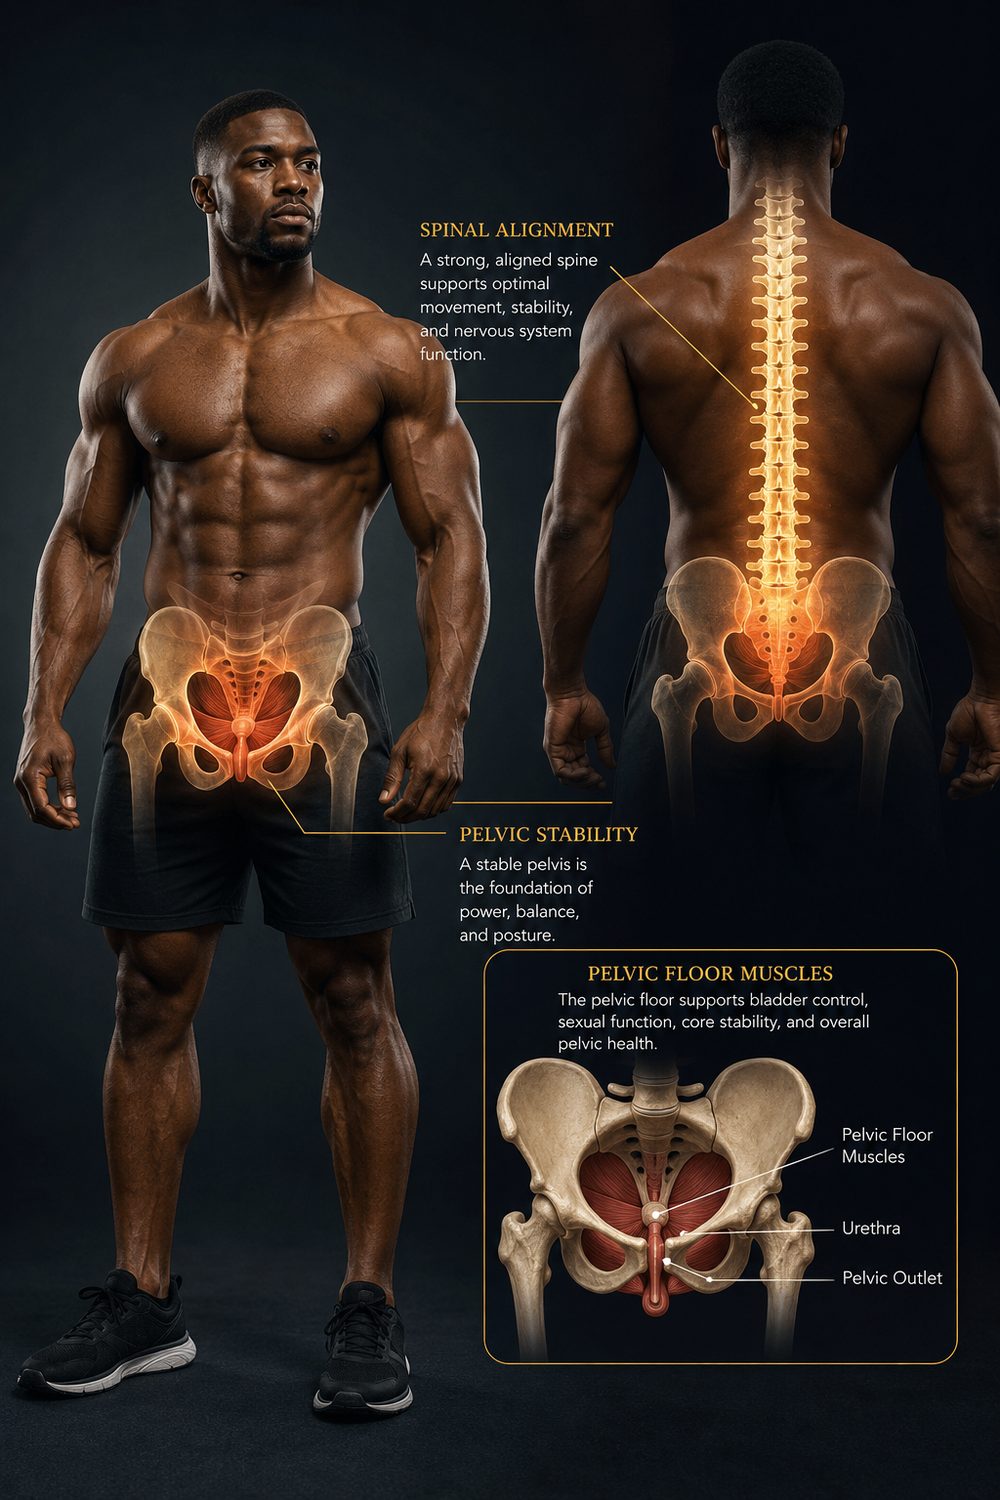
Lying down. 3s hold, 3s release, 45 reps. Goal: isolate the pelvic floor without engaging surrounding muscles.
Lying down. Same tempo — today's focus is a complete, controlled release after every rep.
Lying down. Every repetition should feel almost identical — same strength, timing, and breathing.
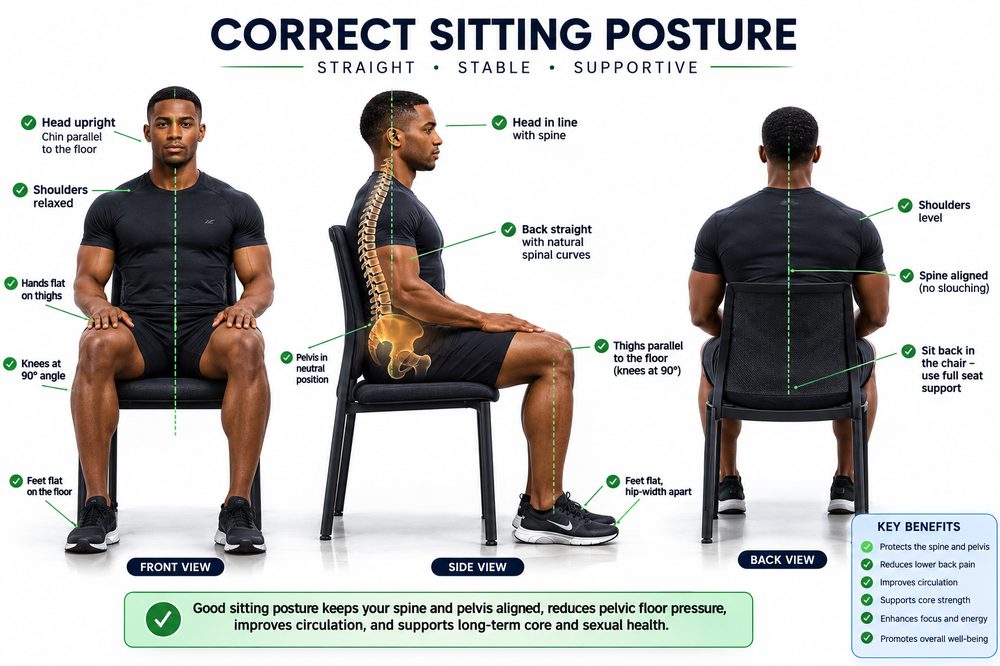
You'll move to a seated position, introducing gentle resistance from gravity while building longer, steadier holds and better breath control.
Sitting. 5s hold, 5s release, 60 reps.
Sitting. Same tempo — keep every rep equally strong start to finish.
Sitting. Learn to breathe naturally through the entire hold.
Sitting. Combine posture, breathing, and control into one smooth session.
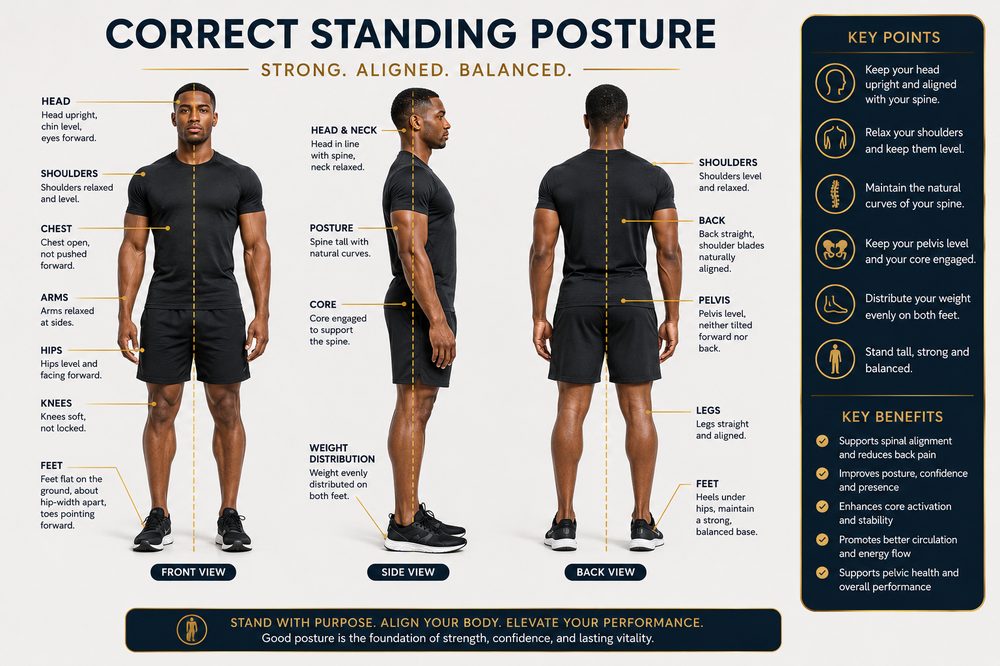
Strength alone isn't enough — your pelvic floor also needs to respond quickly. Days 8–9 stay seated; Days 10–11 move to standing, where you'll add short, rapid contractions to your longer holds.
Sitting. 5s hold/release ×30, then 1s quick contractions ×10 in 5 rounds.
Sitting. 1s contractions ×15 in 5 rounds — clean and deliberate, not rushed.
Standing. Same pattern as Day 8, now upright, without shifting your weight.
Standing. 1s contractions ×20 in 5 rounds, finished with full-body recovery.
The final phase brings strength, endurance, breathing, and speed together into one complete standing routine — finishing with Day 14's graduation session.
Standing. 7s hold/release ×30, then 1s quick control ×45.
Standing. Same holds, then 1s quick contractions ×60.
Standing. Your final guided routine — then a certificate to mark it.
Good alignment while walking and standing supports everything you're building in your daily sessions.
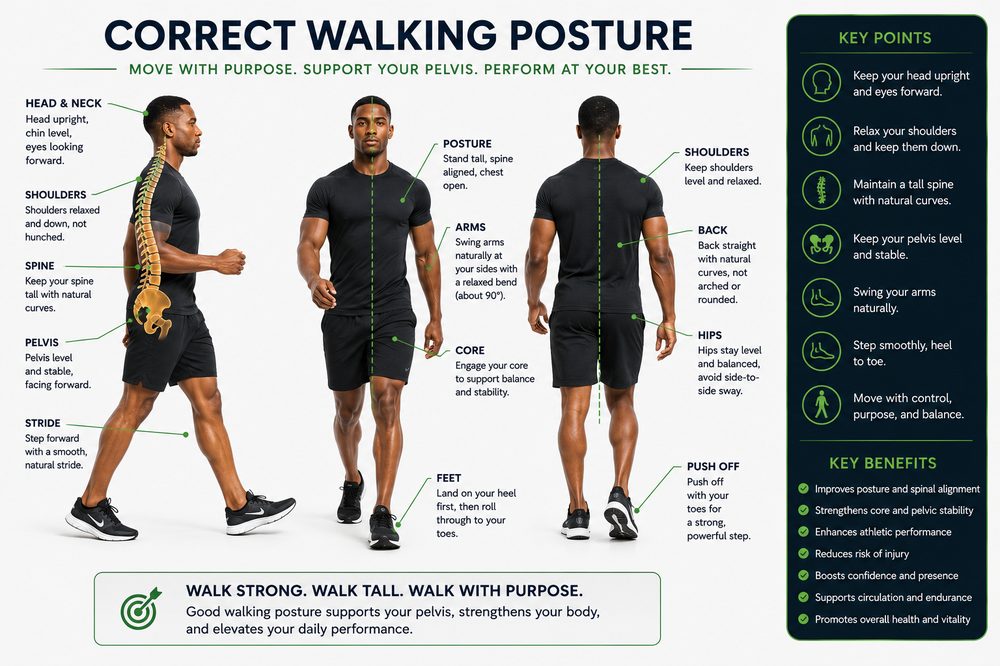
Head upright, spine tall, arms swinging naturally — walk with the same alignment you train with.
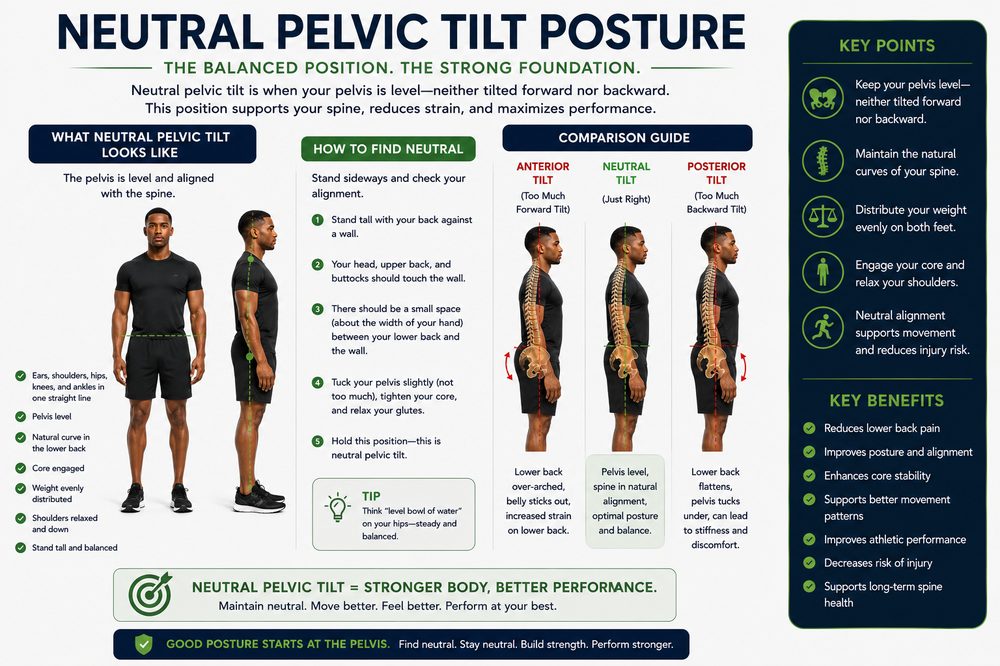
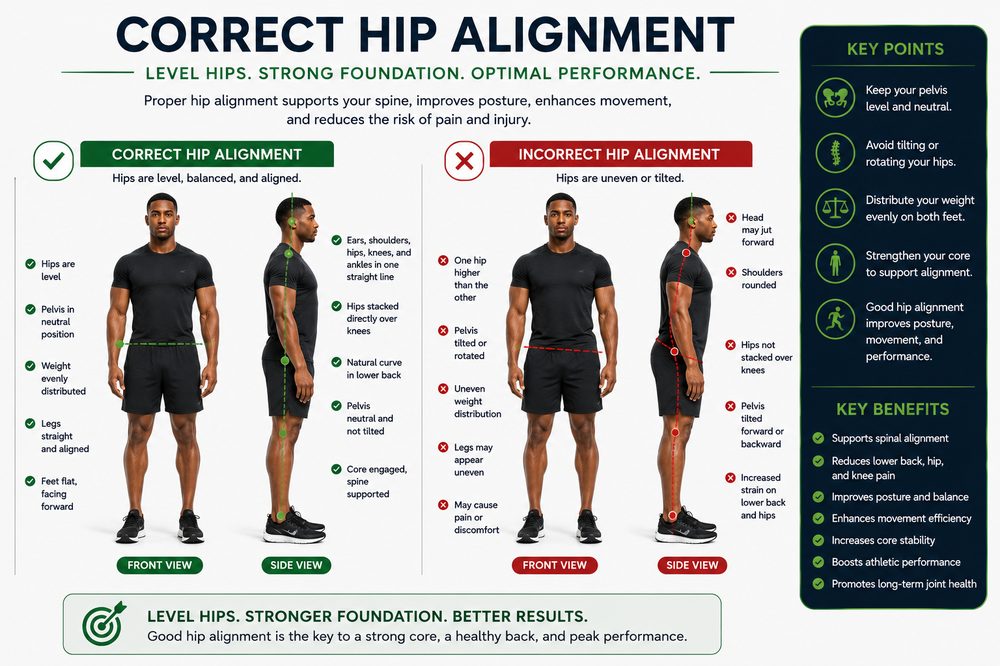
A level pelvis — neither tucked nor tipped forward — is the balanced starting position for every exercise.
Get the full Signature Program with every day, coaching note, and safety guideline included.
Get the Full System